Showing posts with label Lego Party. Show all posts

Thursday, December 29, 2011

Lego Cake Pops


So my first attempt at cake pops was pretty much a complete failure. I saw the idea for Lego head cake pops  here and thought they would be perfect for my son to take to school for his birthday treat. Unfortunately, I didn't quite grasp the appropriate size of the pops. When I make them again, they'll be a lot smaller...


I thought they should be, well, cupcake size. Not a good idea. They were so heavy that the pops buckled under their own weight. Luckily, I made six extras, so there were enough unbroken ones for the 21 kindergarten and first graders in my son's class. (On Mackinac all our elementary classes are splits. The first graders attend school alone in the morning and the kindergartners join them after lunch.)

The day we made them was one of those days where nothing seemed to go right. Not only did the pops bend the sticks and crack, but we also had problems with the candy melts (the yellow coating). And I'm a direction reader! I read them all - and yes, I read them before we got started.

The candy melts (Wilton brand) did not want to melt well, and even when they did liquefy, we had to add shortening to get them liquidy enough to coat the pops. But even then the coating wasn't smooth. Luckily the kids weren't the least bit critical. They identified them immediately as Lego guys and hastily began attacking them (complete with zombie noises.)  The kids didn't care that they were lumpy, cracked, and on bent sticks - because, while they looked nothing like we wanted them to,  they were really tasty!

I'll let you know how round two goes. Right now: Cake Pops - 1, Liz & Miranda - 0...

Tuesday, November 22, 2011

Minifig Cupcakes


I went for easy this year on the Lego-themed birthday cake and didn't make one. I opted to make cupcakes instead. Not very fancy, I know, but my son was pleased. He loved biting off the heads of the extra chocolate minifigs!

(These molds (here and here) made it easy. I looked for them on eBay but they weren't really any cheaper since I would have had to pay for shipping.)

Sunday, November 13, 2011

Lego Minifig Birthday Shirt


Remember that Lego birthday party we did earlier this fall? It's taken me forever to get this post together, but I couldn't not make my son a Lego birthday shirt.

I searched for a pre-made lego minifig pattern (for you non-legoers, a minifig is the technical term for the little Lego people) but I couldn't find one. No biggie - I made my own. If you would like to use it, click on the image below and download it. You probably can just print it out, but I opened it in Word, reset the margins to .5 inch all the way around the and inserted the image. At full size it should be 7.5 inches across by 10 inches tall. At least, that's how I did it. I suppose you could also just print it out and resize it on a copier...


I did not use the raw edge technique for this applique, so there is no seam allowance included in the pattern. Instead, I traced the pieces onto fusible-web and appliqued it that way.
The dashed lines are to help you with placement. The head and the hands go underneath the shirt, as does the top of the pants. For the face, I just used a colon and a parenthesis :) that I resized until I was happy with it. For the number, just print the number you need in a font you like and resize it until you are happy with it. Then trace it onto your fusible web upside down - that way it will be correct when you iron it onto the shirt.
If you aren't sure how to do applique, you could use the tutorial here. However, I did not use a zig-zag stitch like in the tutorial, I straight stitched about 1/8 of an inch inside the edge of each piece (using my edge stitch foot) and sealed the edges of the fabric with Fray Check. It's been through the wash five or six times so far and it still looks great! (Though I do wash it inside out.)
What do you think?

Tuesday, October 25, 2011

A Lego Party


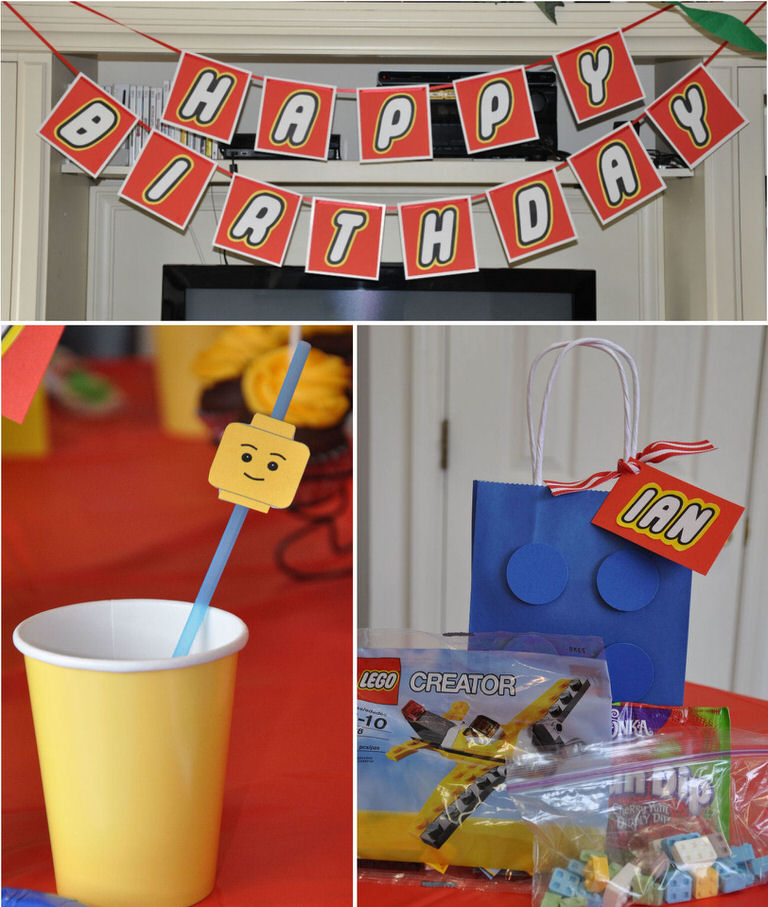
LinkWhat little boy can resist Legos? Mine sure can't; they seem to be all the thinks about right now. (Well, that and bodily functions - he is seven, after all.) I shouldn't have been surprised when he asked for a Lego themed birthday party this year. Did I ever have a lot of fun planning this one! There are a ton of great Lego party ideas out there: here, here, here, here and here, but I also wanted to do a few things on my own. Also, I didn't want to spend a ton of money.

I decided on a palate of bright Lego colors with lots of red and yellow. I was really happy that I actually remembered where I stored the pennant banner I made for this party. I knew it would come in handy!


I wish I could remember where I found all the Lego photos I used as the wall decorations. Some are from here and here, but the best ones came from this guy. He has a ton of wonderful photos of his Lego creations, and he allows them all to be downloaded. My son loved them so much, we actually sent him a thank-you email. All we had on the walls were the photos, balloons, and a banner made using the Lego font. (A similar font is available here.)

I made the banner using Word 2010. The new features in 2010 made getting the LEGO logo coloring just right: Lego font, black letters, yellow outline, red highlight. Each letter was on a separate page and I used my paper cutter to trim away the extra paper. I didn't bother stringing my banner on yarn, I just taped the letters to the wall.

The table decorations were a snap, or at least they "snapped" together easily. (Are you groaning or laughing?) I used a yellow table cloth and placed several Lego scenes around the table. Oh yes, and the Lego candy was a huge hit. Both the kids loved that they could actually build with pieces.


Each person's seat was marked with a place card, held up by a simple three block card holder.


I used actual Legos to stamp on the cards. The bottom of the brick made the rectangular outline, and the top stamped the circles. I found the letter stamps at a garage sale on the island a few years back for $3.00. I'm so glad I brought them home with me!


Probably the most fun part of the table decorations were the minifigs at each place. (For all you non-Lego people out there, minifigs are the little Lego people.) With the help of my friend's son, Parker, each person at the party was greeted by their minifig self when they sat down at the dinner table. You may not be able to tell, but that little plastic character in the photo above is a dead ringer for my mother! I loved them so much, I took the ones for my husband, the kids and myself and snapped a few "family photos."

What do you think, should I send that first photo out with our Christmas card? I think it would be a hoot...