Tuesday, October 25, 2011

A Lego Party


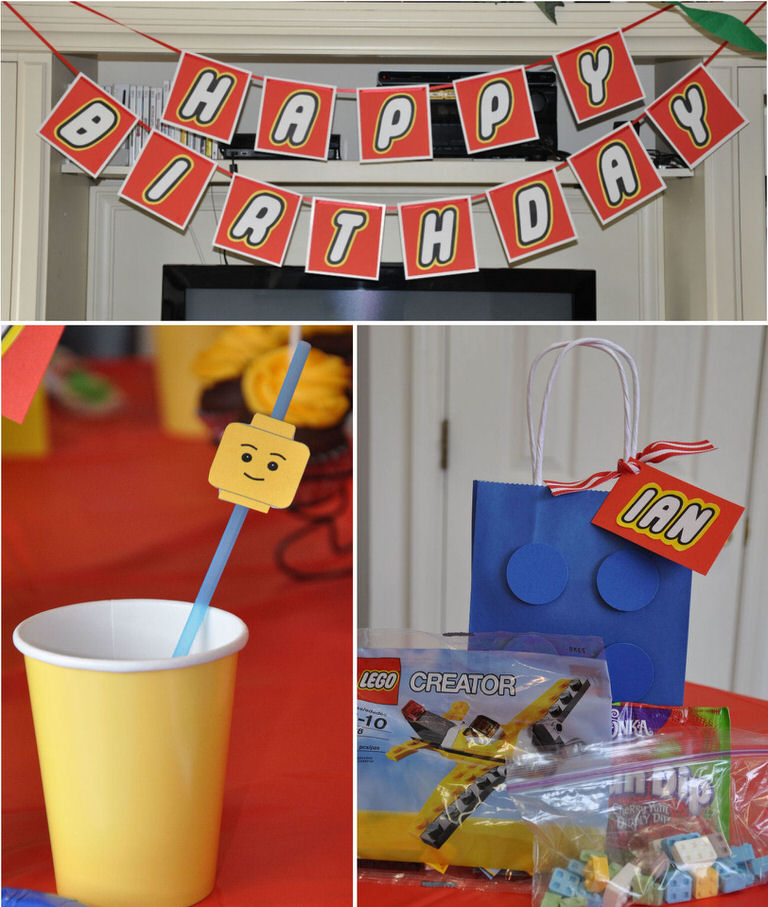
LinkWhat little boy can resist Legos? Mine sure can't; they seem to be all the thinks about right now. (Well, that and bodily functions - he is seven, after all.) I shouldn't have been surprised when he asked for a Lego themed birthday party this year. Did I ever have a lot of fun planning this one! There are a ton of great Lego party ideas out there: here, here, here, here and here, but I also wanted to do a few things on my own. Also, I didn't want to spend a ton of money.

I decided on a palate of bright Lego colors with lots of red and yellow. I was really happy that I actually remembered where I stored the pennant banner I made for this party. I knew it would come in handy!


I wish I could remember where I found all the Lego photos I used as the wall decorations. Some are from here and here, but the best ones came from this guy. He has a ton of wonderful photos of his Lego creations, and he allows them all to be downloaded. My son loved them so much, we actually sent him a thank-you email. All we had on the walls were the photos, balloons, and a banner made using the Lego font. (A similar font is available here.)

I made the banner using Word 2010. The new features in 2010 made getting the LEGO logo coloring just right: Lego font, black letters, yellow outline, red highlight. Each letter was on a separate page and I used my paper cutter to trim away the extra paper. I didn't bother stringing my banner on yarn, I just taped the letters to the wall.

The table decorations were a snap, or at least they "snapped" together easily. (Are you groaning or laughing?) I used a yellow table cloth and placed several Lego scenes around the table. Oh yes, and the Lego candy was a huge hit. Both the kids loved that they could actually build with pieces.


Each person's seat was marked with a place card, held up by a simple three block card holder.


I used actual Legos to stamp on the cards. The bottom of the brick made the rectangular outline, and the top stamped the circles. I found the letter stamps at a garage sale on the island a few years back for $3.00. I'm so glad I brought them home with me!


Probably the most fun part of the table decorations were the minifigs at each place. (For all you non-Lego people out there, minifigs are the little Lego people.) With the help of my friend's son, Parker, each person at the party was greeted by their minifig self when they sat down at the dinner table. You may not be able to tell, but that little plastic character in the photo above is a dead ringer for my mother! I loved them so much, I took the ones for my husband, the kids and myself and snapped a few "family photos."

What do you think, should I send that first photo out with our Christmas card? I think it would be a hoot...

Wednesday, October 12, 2011

Mackinac Moments


Fall on Mackinac the year has been delightful. Absolutely delightful! It's been gorgeous - warm and sunny every day for the past two weeks. I'm sure there's rain in our future, but this has been the nicest fall we've had in years.


How have things been in your neck of the woods?

Sunday, October 2, 2011

Do You See It?


I was riding my bike home the other day, and this dray carrying a load of paving stones past me near the top of Grand Hill. I felt like Richard Dryfus' character in Close Encounters of the Third Kind. Remember how he kept seeing Devil's Tower in everything. I kept staring at that load of rocks thinking,

"The shape of that rock looks so familiar."

So I road up to the dray to get a better look at it. It was just a piece of stone, packaged with about eight or ten other pieces. None of them looked cut, or treated in any special way. They just looked like randomly shaped paving stones headed to someones yard.

That's when it hit me:


It wasn't a perfect Mackinac Shape, but it was so close. Now it's got me wondering if the person who is walking on it every day has noticed...


It was one of those days where I was thrilled that I actually remembered to put my camera in my backpack that morning. Remembering actually was a big deal. Given some changes that have happened at work this year, I'm going in about 15 different directions. I actually left the island this week to go to a doctor's appointment and left my overnight bag in my bike cart on the dock! I couldn't believe it - I've lived here 20 years and that was the first time I've ever left the island without my stuff. Did I ever feel silly...

Sunday, September 25, 2011

More Late Night Visitors


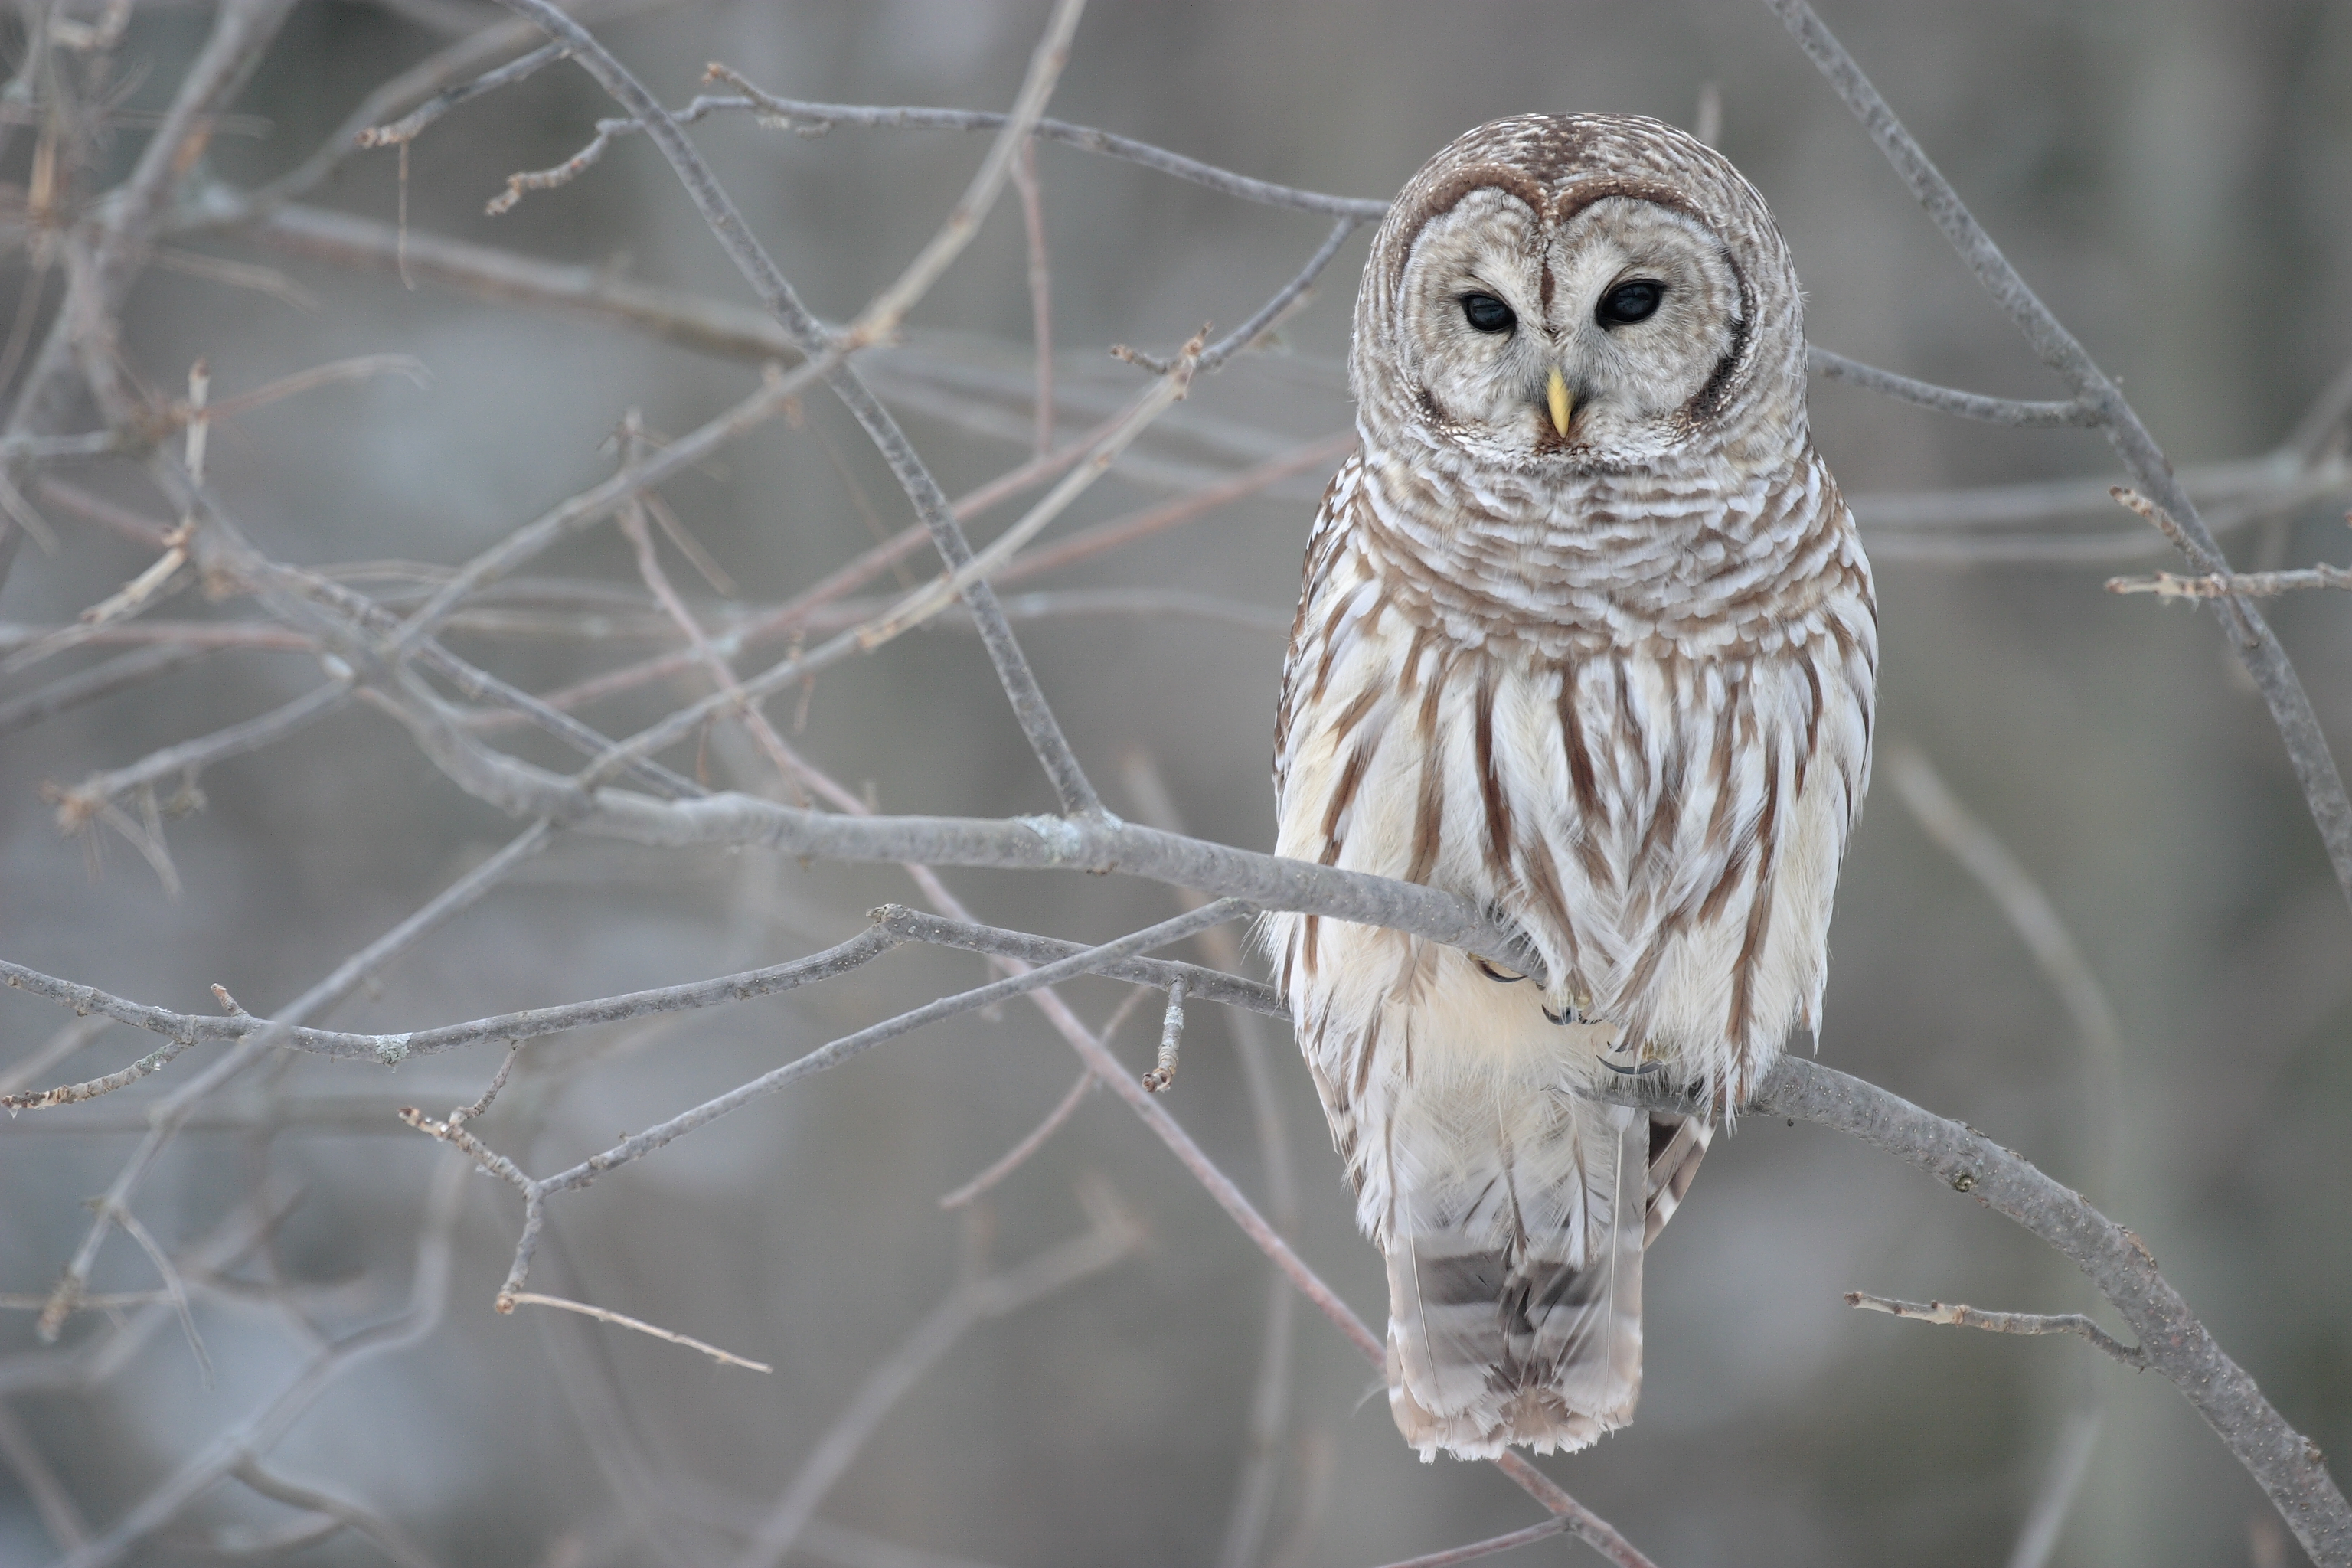
Lately, we've had some very vocal visitors hanging out in the neighborhood. We live right on the edge of Mackinac Island State Park, so we're lucky to have acres of woods right out our back door. Plus, the lots to us on one side, and many of the lots across the street remain undeveloped as well. So, basically, we've got woods almost all the way around the house. I wonder if the owls like to hang out in the tree line and hunt in our yard - like how hawks like to hunt along the sides of the highway...


Regardless of why they're here, it's been wonderful. I'm not sure what time they get started at night, but we hear them at about ten, when we head up to bed. They'll "talk," back and forth, for an hour or so and then all is quiet. We're not sure if they are moving to another area, or just quieting down. Last night we think there were at least three or four of them. Hopefully they'll be back again tonight; it's a nice way to fall asleep...

Credits:

Wednesday, September 14, 2011

Midnight Visitor


A certain little boy in my house lost his very first tooth recently - just days before his seventh birthday. Thank goodness I could find this when I needed it! That poor bunny may have sat in my sewing room cupboard for nearly three years, but it was perfect. The tooth didn't get lost, and the tooth fairy told my son (in her note) that she loved it. She told him that she doesn't like it when she has to fly under the bed to find teeth that fall on the floor, and that she appreciated knowing she wouldn't never have to go searching for his.

At first a few of my son's friends were jealous that got a teeny tiny note from the tooth fairy in addition to the three dollars she left him. But as soon as he explained that he had left a note for her first, and she was just answering him, no one was too upset. In a town as small as ours, you've got to be careful about these things. Years ago one of the island kids found a $100 bill under her pillow after a visit from the tooth fairy. Needless to say, all the other island kids were really upset when the tooth fairy didn't leave hundreds for them too! As I remember, she got a large number of angry letters that year. I was sure glad I didn't have little ones then...

Do you have any interesting toothy traditions in your house?

Our Very Own Font


Do you remember when a rock on Mars was named after Mackinac Island? This week we got a font. How fun is that!

I especially liked how the designers used words like "span" and "bridging the Old World with the New" in their description; very clever I must say.

Then, I discovered it would cost me $239.95 to download it. Well, to be fair, it's on sale for only $191.96 until September 30th.

Such a bargain.

Guess I'll have to do without...

Saturday, September 10, 2011

Kindergarten


Last week school started here on Mackinac Island. My daughter is thrilled to be in Kindergarten this year, and she came home after her second day going on and on about how much she loves kindergarten. When I asked her why kindergarten was so wonderful, she gave me one of those how-can-you-not-know-this looks and said, "The snacks in kindergarten are so much better than in preschool. Mama, Mrs. W's fruit snacks are awesome!"

Thank goodness she got off to such a good start, because her teacher had to keep her after school for about 40 minutes the very next day. Little Miss K didn't want to write her name on her paper, so she snuck over to her brother's desk (on Mackinac, the kindergarten and first graders are in a classroom together) and asked him to write it, which he did. Mrs. W erased the name, after explaining the importance of completing one's own work, and asked K to write it for her self.

Well, K dug in her heels and flat out refused. Plus, she yelled at Mrs. W, insisting, "You're my teacher! You're supposed to help me. It looked nice and now my paper looks yucky." It took her about 30 minutes of sitting in the classroom, by herself, before she was finally willing to write. Then it took another 10 minutes before she would put up the chair so the custodian could sweep.

Sigh

I keep reminding myself how pleased I'll be with that strong will when she's dating, but there are days right now when it's quite challenging...

Wednesday, September 7, 2011

Monday Morning


Monday morning the kids and I walked across the Mackinac Bridge in the 54th Annual Bridge Walk. We had a great time! We walked, stopped for snacks in the middle, and had a blast visiting with our friends up from out of town.


We knew it would be a long day, but we were beat by the time we got home. It wasn't just a five mile walk for us; we had to walk a mile to get to the boat, a 1/2 mile from where the shuttle left us off to get to the bridge, a mile from the end of the bridge to the boat dock in Mackinaw City, and then another mile back home from the dock on the island. It ended up being more like a nine mile walk for us. Well, for the adults anyway; the little ones were able to take breaks in the stroller. Except for my daughter - hers wasn't really a break - she fell asleep by the time we were half way across and rode the rest of the way. Let me tell you, my hips hurt Tuesday morning. But it was so worth it.

How about you, what did you do over the long weekend?

Friday, September 2, 2011

Mackinac Moments


The kids and I were lucky enough to get to enjoy this lovely evening with some good friends. Oh yes, and ice cream; my daughter insists that I include the part about the ice cream.

On nights like this one - with friends, a cool breeze coming off the lake, and a beautiful sky, I just can't imagine being anywhere else...

Saturday, August 27, 2011

A First


You know you live in a small town when the very first time you attend services at a church, you are asked to do a reading. Mackinac Island is a very small town. With only 500 of us here year-round, you pretty much know everybody - really well. It dawned on me the other day that I've lived here for nearly 20 years, I've been friends with the local Episcopal priest all that time, but I've never attended services at the island's Trinity Church.

I decided to go because a dear friend of mine from Philadelphia, who happens to be an Episcopal priest, was giving the Mass that day. (If I got that wrong, please forgive me. I'm not sure what which verb is correct - giving? leading? celebrating?)


photo via

Trinity is a lovely little church, just up a from Market Street, near the bottom Fort Hill. Although services began in the 1830s, the parish wasn't organized until 1873. The members met in the fort and the Court House until the building was finished in 1882. I love that a number of the soldiers from Fort Mackinac provided some of the labor needed to construct the church.

Mass was lovely. All the more special because of my connection with Father R. I'm still not use to referring to him that way. It's been an adjustment for me, learning to see him as a priest. Sure, he is still my friend - the same friend I've had for going on 20 years now, but he's a priest. I first met him back when he was 18 or 19 - in his "pre-priest" days. I guess I just never thought about "priest" and "friend" being the same person. Priests weren't friends - they were up there on the altar - separate from the rest of us. Unknowingly he's helped me learn that priests are people too - just like teachers. R is a wonderful man, and I think the priesthood suits him. Now I know just how my students use to feel when they would see me at Meijer, stare at me with a look of shock on their faces and say, "Teachers shop? I thought you lived at school."

Sunday, August 21, 2011

Mackinac Moments


Mother Nature just couldn't make up her mind today. It would be beautiful and sunny and then dark thunderous storm clouds would roll through. Then, the sun would come out again.

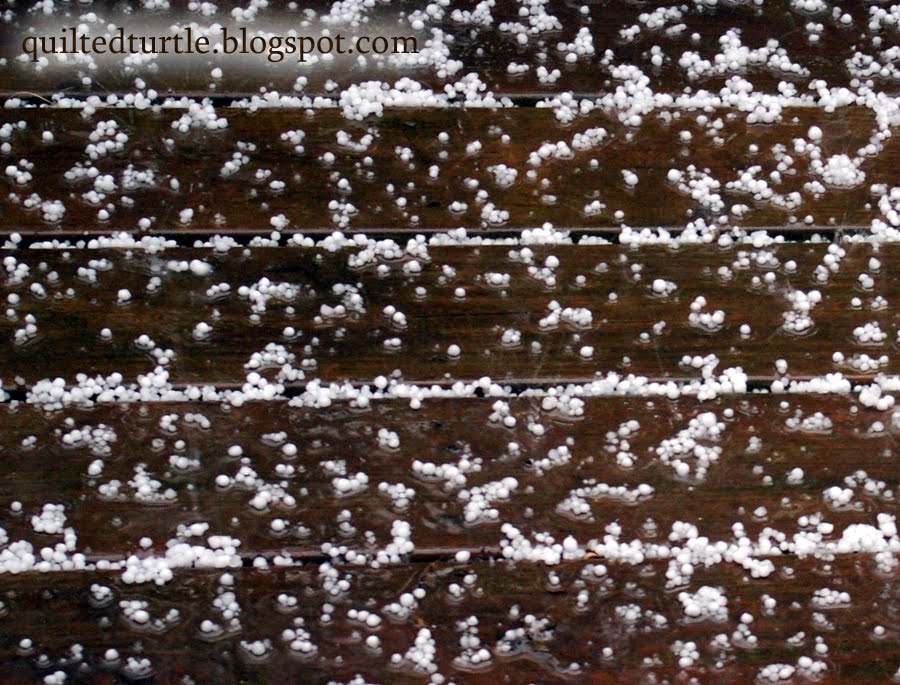
The first storm that went through this morning actually brought us some pea-sized hail.


It was a perfect day to work inside. I managed to get quite a bit done in my classroom and only got a little damp on my bike ride home...

Friday, August 12, 2011

Adjustable Headband Tutorial


Earlier this summer my daughter chopped her hair. And I mean chopped. She went from having hair that fell to the middle of her back without bangs, to having chin length hair with bangs. Now we are working on growing those bangs out but they keep falling into her face. Ugh! It must be the teacher in me, but hair in a child's eyes drives me nuts. (The little girl above, with the beautiful curls, is my daughter's friend. Sadly, my little girl had absolutely no interest in modeling for me.)

I love these headbands because they're adjustable. At their smallest, they fit a two to three year-old, but adjusted to their largest size they'll fit an adult. I made my first batch back in 2009, but never did a tutorial. This past June I got an email from Lisa in California hoping that I would share how I made them, and I thought that I'd better get it done before school started. I'm looking at a crazy school year coming up (but more on that another day). So, Lisa, this one's for you!

Let's get started, shall we...


Here's what you'll need:
  • Fabric - two pieces measuring 2 in (5 cm) by 14 in (35.5 cm)
  • Matching thread
  • Rotary cutter, ruler and mat, though you can just use scissors
  • Scissors
  • 3/8 inch (1 cm) wide elastic - 14 inches (35.5 cm) long
  • Pins
  • Fabric marking pen
  • 3/8 inch Lingerie strap slides & rings - mine were made by Dritz. I found them at Joann Fabrics in the notions section. They came in a package of six - two white, two black and two clear. Slides from an old bra will work just fine, too.
  • A knitting needle or something similar to turn the headband right side out after sewing
Step One: Choose Your Fabrics


I really love using a striped fabric for these, but be aware of the direction you want to stripes to go. In the school fabric shown above, I wanted the ruler to go around my daughter's head, so I had to purchase 1/2 yard (about 45 cm.) For the sample headband shown above, I wanted the stripes to be perpendicular to the long sides of the headband, so I only needed to buy 1/4 yard (about 21 cm.) The hot pink backing was a fat quarter.


I like to make these reversible, so I use two different fabrics. Only one will show at a time, so they don't really need to coordinate.

Step Two: Cut Your Fabric


Cut two strips of fabric so each is 2 in by 14 in. (5 cm by 35.5 cm) If you have a strip of a design element you'd like to use, you can cut them a bit narrower or wider. Just make sure to cut the strips the same width. For the ruler headband I just used my rotary ruler to cut 1/4 inch outside each side of the ruler on the fabric. (That headband is narrower than two inches.)

Step Three: Tapering the Ends


In order to taper the ends of the headband, you need to find the center. Fold both strips in half length wise and press.


Now, stack the four ends on top of one another.


Use your fabric marking pen and mark a line for the taper on the end. I didn't measure, I just kind of winged it. Just be sure not to make the end of the headband too narrow.


Cut off the little triangle pieces. Make sure you press hard - you are cutting through four layers of fabric.


When you unfold the fabric it should look something like this. At this point you could press out the fold, but I kind of like having it there as a guide to help me when I put in the elastic.


Now, you don't have to taper the ends. You can just leave them square - like these. I just think they look a little nicer tapered.

Step Four: Elastic

Cut your elastic into two pieces:
  • 2 inches (5 cm)
  • 12 inches (30.5 cm)


Start by sliding the ring onto the small piece of elastic. If you are using old bra hardware, you'll probably be using a slide - the piece that looks like a squashed 8. (At least all the bras I've taken apart have two slides rather than a ring and a slide.) It's OK if you have two slides - just turn the slide so it is laying on its side - so that the 8 looks like it's laying down. Place the small piece of elastic through the hole on the right side of the slide. It will work just like the ring, just with a separation down the middle.


Next, fold the elastic in half and place it on the end of the headband like this:


I like to pin it in place so it doesn't move around too much.


Step Five: Sewing

Place the two pieces of your headband right sides together and pin into place. Beginning at the end without the elastic, stitch all the way around the outside using a 1/4 inch (about .5 cm) seam allowance. Be sure to leave the non-elastic end open for turning. I like to back stitch over the elastic to make sure it's really sewn in well.


Step Six: Turning

Clip the corners of the elastic end. Do not clip the other end.


Insert your knitting needle, or whatever you are using, and turn your headband right side out.


When you're done, you'll have something like this:


Press the headband flat. Take your time with this step so the edges are nice and crisp. I had to use the knitting needle to help push out the corners on mine. You'll notice my elastic looks a little wonky; I thought about redoing it, but it's hidden by my daughter's hair so I wasn't too worried about it. I know the elastic looks long, but it needs to be to give the presser foot enough room to stitch around it. If you'd like a much shorter piece sticking out, you could hand sew that end.


Now, move over to that unfinished end. Take the unfinished fabric ends and tuck them into the end of the headband about 1/4 inch (about .5 cm) or so and press. You want a nice neat end. That knitting needle came in really handy here, too. You'll sew that end closed in a few minutes.

Step Seven: Elastic Part Two

Take your remaining slide and place it on your remaining piece of elastic. (It doesn't matter which end.)


Fold the end over,


and stitch into place. I found a zipper foot really helpful here. It let me sew much closer to the slide. You could also sew it by hand.


Step Eight: Putting It All Together


Lay your headband out on your sewing table. Put the side you like the best facing the table, though it really doesn't matter.


Hold on to the end of the elastic that you stitched to the slide.


Thread the elastic through the ring (or the empty hole if you are using a slide instead of a ring) and then back and into the first hole on the slide.


Next, put the elastic down into the other hole on the slide.


Slide the end of the elastic into the end of the headband and pin into place.


Step Nine: Finishing

You really only need to sew the end of the headband to hold the elastic in place, but I think they look so much nicer when the stitching goes all the way around.

Did you know that if you put your bobbin thread through the little hole in the arm on your bobbin case (at least on my Bernina machine) it keeps the bobbin thread from being visible on the top of your sewing? A nice thing to know when you need to use a different color thread in the top and the bottom.


I used my edge stitch foot to stitch all the way around my headband. If you don't have an edge stitch foot, just put your needle all the way over to one side and use your smallest presser foot as a guide so you'll get a nice even stitching line. Or just go out and buy the edge stitch foot for your machine. I love this foot! People will "ooh" and "aah" at how nice your stitching looks; only you'll know who easy it is was. Seriously - go get one!


If you are worried, go back and add in a second line of stitching on the ends - just to make sure the elastic won't pull out.

See what I mean about the bobbin thread not showing? Not a bit of pink shows through to the top.


That's it - you're done! I'm telling you though, these headbands are kind of like potato chips; once you start making them, you can't stop.


Just think of how cute your special little girl will look with one in her hair. And the best part it, she'll never out grow it because it's adjustable!


Of all the headbands I've made, the little dog one is my favorite. That fabric was a little harder because it didn't have a straight line stripe where I could easily cut. So, I laid my rotary ruler down on top of the fabric and lined up the 1/2 inch line with the dogs feet and cut. That way I had 1/4 inch between the dogs and the edge of the headband and my 1/4 inch seam allowance. That one is also a bit wider than two inches - it really doesn't matter as long as the two fabric pieces are cut to the same size.

Now, go make some headbands...